Welcome to Bepa's Garden!
This blog is about organic gardening, healthy eating and healthy living.
Each month I will be posting Garden To-Do Lists, Tips & Techniques, Garden Project Plans, Photos from the Garden, Recipes and Book Reviews.
I hope you enjoy reading and I hope I can inspire others to start a backyard garden!
Happy Gardening!
~Rob~

Pages

Thursday, September 30, 2010

Mini-greenhouse

Carrots started 2 weeks ago for winter harvest

With the winter garden coming along nicely it is time to get started building the mini-greenhouses to protect the plants from our northeast winter. This weekend, if all goes well, I will be building four 4' x 6' units to cover my lettuce, spinach, broccoli, cauliflower and cabbage. The design has changed several times, but I think I have finally come up with something that will work well for my garden. The original plan was to build a structure and just wrap it with row covers, using bricks on the sides to hold down the covers. After pondering the design more I decided to add hinged roof panels that will allow easy access for watering and harvesting. They will also be able to be propped up to regulate temperature if it gets too hot inside. I purchased greenhouse plastic from Growers Supply to cover the units when the temps drop below freezing.


After I build one, and work out all the details,  I will be posting pictures and the basic plan if anyone is interested in building one for themselves. I may also put together a package that includes full size plans, materials lists, cut lists and exploded view drawings with assembly instructions, available for a small fee to cover the cost of printing and postage.

Monday, September 20, 2010

Planting the winter garden

Asparagus seeding out

As the last of the tomatoes & eggplant are being harvested and the herbs are about ready to pick and dry for winter use, I am beginning to plant my winter garden. For the past few years I have wanted to plant crops for winter harvest but always seemed to be too busy to get them planted. Last year I did manage to get carrots in which we harvested until January - they were absolutely delicious! This year I planned ahead and was able to start seeds and plant on time. I started cabbage (red and savoy), broccoli and cauliflower seeds in soil blocks on a heat mat in the beginning of August. A week later I was able to transplant them into larger flats in the greenhouse. After a minor attack from cabbage worms they are in the garden and growing nicely.


Floating row cover on lettuce

Cabbage plants
I direct sowed carrots, romaine lettuce, fall & winter lettuce, mache, spinach and kale on September 13th. By the 16th almost everything had started to come up. The night temps have been in the 50's with daytime temps in the 70's, other than being dry the weather has been perfect. I have 4' x 4' x 1' wire baskets covering the plants with row covers on top. In a week or two I am going to build "mini greenhouses" to cover the plants for the winter.  I am planning on making three 4' x 12' mini greenhouses to start with and will be covering them with plastic to protect the plants from the winter frost.
Spinach Seedling
Lettuce Seedlings
The mini greenhouses will be running east to west with hinged lids on the south side. They should be adequate to keep the plants from freezing and help keep unwanted pests out. In the spring I will remove the plastic and replace with row covers to start next spring's crop. You can find great books by Eliot Coleman on growing a winter harvest in my resources section.

Sunday, September 5, 2010

Sunday Breakfast in the Garden

Niffer, Maisy and Mimsy

I woke up this morning and turned on the TV to watch the Sunday morning news. As I sat down I started smelling the faint smell of a skunk coming in through the open upstairs bedroom windows. The smell was now getting stronger so I decided to see if maybe a skunk had gotten in the garden. I looked out the back door and on the patio was a black rabbit standing there looking in at me! At first I thought it was a rabbit that had maybe escaped from someone in the neighborhood, but then I realized it was Niffer. Maisy, our grey rabbit, was in the pen stomping her back feet, obviously angry about something. I walked out to the pen to see how they could have have gotten out. Over the years they have dug a series of tunnels inside their pen. In the fall I put a bale of hay in their cage that they take down into their hole for the winter. They have dug very deep tunnels, but have never tried to dig out, something they could easily do in a matter of minutes. Maisy was now at the other end of the pen sticking her head through a hole the size of a baseball, luckily she was too fat to fit through. I can't tell if they chewed the wire, or if something ate through trying to get in. Niffer was now following me around, but when I went to grab her she ran towards the fence. I was worried that she might get startled and run underneath into the neighbors yard. She finally jumped onto the wood pile where I was able to catch her. I put her back in the pen but I couldn't see Mimsy, our little tan rabbit, anywhere. I looked around the yard but still couldn't see her. I happened to look at the garden and there was Mimsy, happy as can be, enjoying her breakfast of my newly planted cabbage seedlings! I called her and she came hopping to me like it was no big deal that she was outside her pen snacking on my cabbage plants! Everyone is now back in their cage safe and sound. These are the most spoiled rabbits. They have a 3' x 8' double hutch, up off the ground with sleeping boxes inside connected to an 8' x 8' fenced in run. They get daily vegetable scraps left over from our lunches and dinners and whenever I am harvesting cabbage, carrots, beets or salad greens I always throw a bunch or two in to them. I have to wonder if this was a thought out plot, that Niffer was the look-out at the patio door while Mimsy helped herself in the garden. Maisy was probably trying to fit through the hole in the pen to join them when a skunk saw what they were doing and sprayed, trying to chase them away from her feast!

I think tomorrow I will build them the new pen that I have been wanting to build for a year now!

Sunday, August 15, 2010


I just finished watching the movie, FOOD, Inc., directed and produced by Robert Kenner (we borrowed our copy from the local library). This movie shows you where your food comes from and how farms today are "factory" farms, designed to produce more product at the cost of your health and safety. It talks about the beef, chicken and pork industries and the seed and chemical industries. It is a very informative (and disturbing) film that will open your eyes to the food industry. It will (or should) make you think twice about what you eat and help you make better choices about what foods you buy. Everyone can do their part in making a difference. Buy local organic foods, support your local small farmers, don't buy overly processed foods and read labels to see what exactly is in the foods you are buying. You can also plant an organic garden. Even a small garden can make a difference. Every year I buy organic seeds to plant in my garden, which usually come 50 - 100 seeds per packet. I usually over plant and end up with way more seedlings than I have room for, or leftover seeds. To help make a difference and hopefully encourage people to start organic gardens, I will be offering free seedlings, and possibly seeds next spring to anyone interested in them. I will post more details on this at a later date.

Visit www.takepart.com/foodinc for more information and to see how you can make a difference.

Friday, July 23, 2010

Happy Reunion!

Chick that hatched on 4/04/10

This week I had the opportunity to visit the chickens I hatched this past April. I ordered a dozen Buff Orpington hatching eggs from a hatchery and put them into the incubator on 3/16/10. The first chick to hatch arrived on 4/4/10, Easter Sunday, it was a nice Easter surprise. Out of 13 eggs, I ended up with 10 that hatched. The first chick to hatch, for some reason, was smaller than the others. She was always easy to pick out of the flock because of her size.


Pictured above are the chicks on 4/14/10. They were playing in a pen I set up in the backyard. The sun was out and the weather had warmed up enough to let them play outside for a while in the afternoon. They were scratching at the dirt and looking for bugs. I knew I couldn't keep them, I checked with the town (which was probably a mistake) and was told I didn't have enough land to raise chickens. There are many cities and towns that have changed, or are changing their zoning laws to allow homeowners to raise chickens. There has been a huge uprising in home gardening and folks wanting to keep chickens mainly for eggs. Usually you are limited to 6 hens and no roosters. Luckily I was able to find someone to take them, who happened to be a friend of my daughter, so I am able to visit them and watch them grow.


Here are the chickens on 7/20/10. They are huge compared to the last time I saw them. Out of the 10 that hatched, there ended up being 3 roosters and 7 hens. A nice looking flock! Seeing them again made me wish I could have kept them and raised them. It was a very memorable and exciting experience hatching them, something I hope to do again soon.  Who knows, maybe I'll petition the town to try and get the laws changed!

A great book for anyone interested in raising chickens is The Joy of Keeping Chickens by Jennifer Megyesi.

Wednesday, July 21, 2010

Garden Pests

Tomato Hornworm (photo by C. Terry)

Now that the garden is coming in nice the pests are starting to attack in full force. This past weekend while weeding I came across the tomato hornworm (pictured above) eating my potato plants. This is the first time I have seen one in my garden. Johnny's has a very informative video about this ugly pest. Last year we noticed the hummingbird moths flying around in our butterfly garden and didn't realize that they lay the eggs that turn into the tomato hornworm. I check my garden every morning handpicking any pest I might see, so I noticed him right away and he didn't have time to do too much damage. I also use row covers early in the spring when I plant to keep the pests from laying their eggs on the leaves of the plants. Using row covers along with applications of compost tea seems to work pretty good. I still get the occasional pest, but not nearly as many as I used to.

Saturday, July 17, 2010

Rasbperry Sloosh


I finally got around to trying my hand at making raspberry juice, like my grandmother (Mema) used to make. The first batch was good, but didn't really taste like Mema's. It was clear and a little watery, even though I didn't add to much water. The second batch came out excellent! The key, as I remember, is to use over ripe raspberries, the one's that are deep red, almost dark purple and about to fall off the bush. They are the juiciest and seem to have the most pulp. The second batch cooked down nice and was cloudy, pulpy and thick, just like I remembered!

This is the recipe I used:
  • Thoroughly rinse the berries and place them in a heavy pot with just enough water to make them float. Less water is better for a thick concentrate.
  • Bring to a boil, mash down the raspberries with a potato masher and then bring back to a boil.
  • Line a strainer with several layers of cheese cloth and pour the mixture through collecting the juice into a bowl. Let the strained mixture sit for a bit as the juice will continue to drain.
  • When most of the juice has drained and the mixture has cooled, fold up the cheesecloth into a bag and gently squeeze to get the remaining juice and pulp. 
  • Put collected juice back into pot and add sugar to taste. I used only a 1/4 cup of sugar, you can add more later if needed. Bring back to a slight boil to make the mixture thicken up.  
  • When the mixture cooled a bit I poured into mason jars to store in the refrigerator. You can put into a canning bath to preserve the juice for later use, but I know it won't last long in my house so I just put it in the refrigerator.
The mixture you end up with is sort of a thick concentrate. To make juice I diluted it in 3 parts water. Add a fresh lemon slice and enjoy!

There is nothing more refreshing that a nice cool glass of raspberry juice on a hot summer day!

Wednesday, July 14, 2010

We be jammin'!


Since I am the one whose creative efforts produced these wonderful jams, I am allowed to be a guest contributor. I feel honored because my husband is usually really picky about his projects and this blog is one of his "babies". Since he wants me to keep making treats for him, I guess he really doesn't have a choice in letting me be a contributor. I love ya' honey!
For years I have been meaning to make homemade jam. I always talked myself out of it because the task seemed so daunting. This year we have more raspberries than we know what to do with. That is even after giving a ton away and letting the birds have their fill. So with a quick Google search and a little encouragement from Rob I gave it a try. I was amazed at how easy jam is to make! Once you have the equipment you need, jam making is a breeze!
Besides berries, pectin and sugar you do need some special equipment. I found everything I needed at Walmart and it was cheaper than anyplace else I searched. A canner is essential. A canner is basically an extra large stockpot with a lid and handled basket and to hold your jars. You also need a jar grabber (self-explanatory), wide-mouth funnel, magnetic lid grabber, and jars, and lids. The grabber, funnel, and lid grabber come as a kit at Walmart. I bought everything I needed for $33.83!
I won't go into specific details about how to make the jam, there is an easy recipe in each and every box of pectin (gelling agent). What I will say is follow them exactly and you will have perfect results. I'd also like to comment on how satisfying it is to take berries grown in your own yard and turn them into little jars of jeweled sunshine! Seeing the delight on my family's faces as they spread the jam on fresh baked fluffy biscuits sends my heart soaring. Hearing their "yummy noises" makes me proud to be carrying on the traditions of my mother and Rob's grandmother. Knowing that I am giving my children treasures that aren't materialistic solidifies my belief that it's the simple things that make this journey we call life richer and more wonderful!

Monday, July 5, 2010

Vegan Raspberry / Blueberry Cheescake

Vegan Raspberry / Blueberry Cheesecake

We have been looking for recipes to use with all the raspberries that we have been getting this year. This recipe comes form Alicia Silverstone's book The Kind Diet. I have modified the recipe slightly after making it a few times. This is a vegan recipe that doesn't contain dairy. It is absolutely delicious!


Ingredients:

1/2 cup Earth Balance Butter
2 cups graham cracker crumbs
1 (12 oz) package silken tofu
1 cup nondairy cream cheese
1 tablespoon safflower oil
1/4 cup maple syrup
1/4 cup soy milk
2 teaspoons arrowroot
1 teaspoon vanilla extract
Fresh raspberries and blueberries for topping

Preheat oven to 350 deg.
Oil an 8" or 9" spring form pan.
Melt the butter in a small saucepan. Remove from heat and stir in graham cracker crumbs. Press the mixture into bottom and slightly up sides of spring form pan. Bake for 5 minutes and then let cool on baking rack.

Combine tofu, cream cheese, oil, syrup, soy milk, arrowroot and vanilla extract in a food processor or blender and process until smooth. Pour the mixture into the graham cracker crust and smooth the top with a spatula.

Bake the cheesecake for 45 minutes to 1 hour. Let the cheesecake cool to room temperature. Toss fresh raspberries and blueberries with 1 to 2 teaspoons of maple syrup to create a slight glaze. Top the cheesecake with the berries and chill until ready to serve.

Shared at:


Thursday, July 1, 2010

Bursting with Berries!

The raspberries are just about up to their peak yield. They should be producing consistently throughout the summer and into the fall. The bushes are so loaded with ripening berries they are starting to lean over from all the weight. The birds seem to be leaving them alone, although I have caught the occasional squirrel sitting on the edge of the deck snacking in the afternoon.

We have been picking about 4 to 6 pints daily (plus 1 to 2 pints consumed while picking!) and have been enjoying them for dessert after dinner. Tonight we are having raspberry / peach cobbler! This weekend (for fourth of July) I am making a vegan raspberry cheescake.


This year there is definitely a greater yield than last. There is a bunch of new growth and new plants starting. I am going to try and weed some out to start another patch. The canes for the 2nd crop are staring to grow tall. They will end up being over 8' tall when they start producing in August. We are going to try making raspberry jam this year with all the extra raspberries we are getting.

Wednesday, June 23, 2010

Wonderful Wednesdays Gardening


To share my love of gardening, I built and donated a couple of planters to Oswegatchie Elementary School for their Wonderful Wednesdays Gardening program. In the program the children walked through the woods and collected materials to create moss gardens, planted spider plants & petunias and filled the planters with an array of colorful plants which are now located at the entrance to the school.


Saturday, June 19, 2010

Baby Robins


Every year the robins build their nests in the wisteria around our yard. The baby robins have hatched and are growing quickly. While sitting in the back yard we watch the mother flying back and forth bringing food for her babies.


Friday, June 18, 2010

Ripening Raspberries


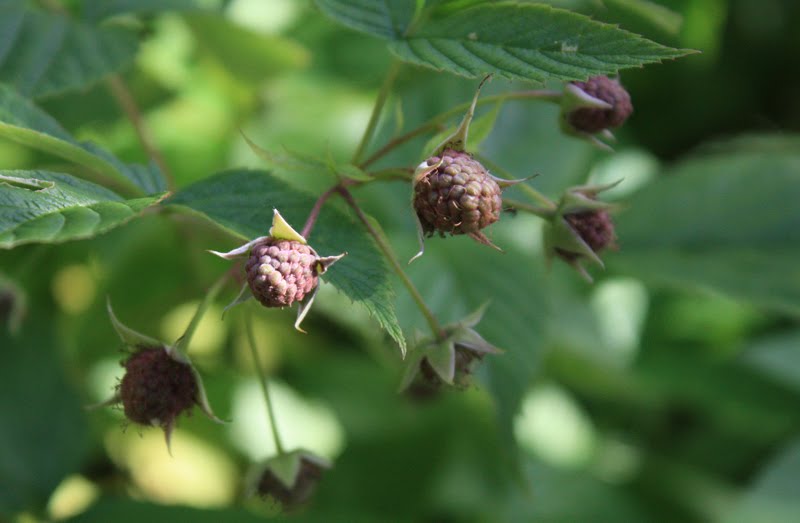
The raspberries are loaded and are starting to ripen! This year looks like a higher yield than last. I have 2 varieties planted, one yields end of June - beginning of July and the second variety yields in end of June, end of August and again in beginning of October. I was amazed to get three harvests last year. I think we picked raspberries almost every day from the end of June to the beginning of October. I thinned out some of the runners from the main plants so more energy would go into producing berries (and it looks like it it is working). I have a ton of new plants starting all over the place, some are quite thick and large and I am going to try to pot them up to give away,(I don't like to just throwing them away). The main plants are about 5' tall and they will go into another growth spurt after the first harvest. Last year they grew to over 8' tall. The second and last harvest yields berries the size of your thumb - so sweet and juicy! Now if I could only remember Mema's recipe for raspberry juice!

Wednesday, June 9, 2010

Organic Gardening Resources


What are your favorite books, magazines or websites about organic gardening?

I am an avid reader. That's how I learn new gardening techniques. When I am interested in something I usually go to the library or look online and try and get as much information as I can on the subject. There is a lot of information out there, but it usually takes a good amount of effort and time to dig through it all. There are some books that are invaluable to me, that contain a wealth of useful (and more importantly) accurate information. The three top books that I would recommend to anyone would have to be The New Organic Grower, Four-Season Harvest and The Winter Harvest Handbook, all by Eliot Coleman. Out of all the organic gardening books I have read, these have by far been the most helpful. Another great book would have to be Seed to Seed, by Suzanne Ashworth. This book is for anyone who is interested in saving their own seeds. It gives information on all varieties of plants and outlines step by step techniques to dry and save seed properly. I first learned of this book through Seed Savers Exchange , which is an organization dedicated to saving and sharing heirloom organic seeds that are NON-GMO.

I have a long list of books, magazines, websites, organizations and suppliers that I find very informative and useful. I am going to add a "Resources" column to list them for anyone looking for more information on organic gardening.

What are some of your favorite resources?

Monday, June 7, 2010

Quail in their summer home

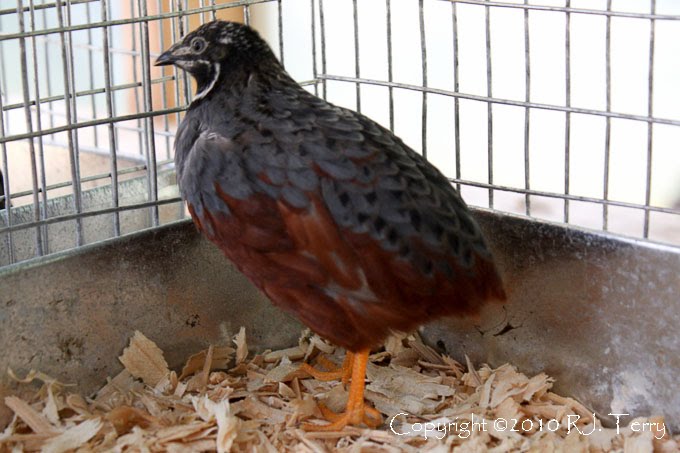
The quail have been moved to their new (summer) home in the greenhouse. The greenhouse gets full sun until the end of May when the maple tree gets its leaves. Most of the plants are in the ground now, except for a few eggplant & tomato plants so I figured they would enjoy the fresh air and filtered sun. I have been able to regulate the temperature by using shade covers so the only gets to around 85 degrees in full late afternoon sun. The vents provide nice cross ventilation and the occasional bug for them to snack on. They seem to enjoy it out in the greenhouse!

Sunday, June 6, 2010

Pumpkins

Pumpkins planted 5/30/10

The garden is finally planted, except for the tomato, eggplant and cantaloupe plants that are growing nicely in the greenhouse. We are expecting strong storms later today and tonight so I am holding off on planting them until tomorrow. Last weekend we planted the rest of the seeds. We put in pumpkins, winter squash, kombucha squash, zucchini, beets, and beans. I took the chives from the greenhouse and planted them in a raised bed that we are turning into our perennial herb garden. The chives were broken up and planted along with 3 types of basil, 2 types of parsley, thyme, rosemary, and sage. I added two tomato plants and 2 fairy tale eggplant plants to the center.


Beets planted 5/30/10

Saturday, June 5, 2010

Tree Frogs

With the warm, summer-like, evening temperatures we hear all kinds of critters chattering at night. Lately we have been serenaded with the sounds of the tree frogs. This little guy was on the tree in our backyard near our pond. Last year one made its way into the greenhouse in the fall and spent the winter nestled down in one of the potted plants.


Planting the garden

Spent the last two days planting the gardens. The weather has been beautiful - sunny skies and temperatures in the upper 80's! I uncovered the garden beds a few weeks ago - cleaned off the crushed leaves I put on in the fall and gently cultivated the beds. Yesterday I noticed about 50 tomato plants coming up where the tomatoes were last year! A few tomatoes must have fallen to the ground, and after the winter, leaves and cultivation somehow still managed to grow. The same thing happened with the potatoes. This year I decided not to put in any because they took up too much room last year and I wanted to plant squash and pumpkins in the beds instead. About a dozen plants came up this spring - I must have missed a few potatoes when I harvested in the fall. I left the plants to see if they will yield anything.


The greenhouse has been getting extremely hot during the afternoon. It is covered with plastic film, has a vent on one end and a door on the other, but still gets up to 110 degrees in the afternoon sun. Yesterday I put an exterior sunshade on the north side roof and an interior sunshade on the south that I can roll and unroll to control the temp. I used the shades in the afternoon and kept the temp under 95 degrees. So far it seems

Asparagus

The last of the asparagus has finally been picked for the season. This year we had a very good crop. We harvested it from early spring until just last weekend. The patch was put in about 4 years ago, but I mistakenly cut down all the tiny spears that came up the first year. I didn't know that you are supposed to let some of the spears seed out because it forces more to come up the following year. The stalks should be left until fall when they turn brown, and then cut down to the ground. You are also not supposed to cut heavily until the third year. My asparagus is mulched heavy with leaf mulch which keeps the plants moist and holds down weeds. It is important to keep the weeds at bay so they don't compete with the asparagus. Last year I saved some seeds and am going to try to start more plants. Asparagus is a perennial vegetable, the plants should produce for many years. My asparagus crowns were purchased from Cook's Garden.

Raspberries

The raspberries are coming in nice again this year. I can't wait to taste that first berry of the season! I put in 12 raspberry plants several years ago. They were located on the southern side of my property, next to the garage. The plants grew spindly, never got very tall and produced only a handful of small, sweet raspberries. Three years ago I decided to move the plants to a small space next to the deck. After planting them I cut the canes to waist height and mulched them heavily in the fall with shredded leaves from our maple trees. That first year after moving them, the plants produced raspberries like crazy. I have two varieties planted, one produces in early and late summer, the other produces in mid summer and early fall so we get a steady supply of raspberries. The plants grew to about 5' tall with 1/2" to 3/4" canes. The raspberries were about the size of my thumb and were delicious! I was picking close to 3 pints a day! The first year after moving them I thought it would be a good idea to cover them with mesh to keep the birds out, seeing that it was only a small patch. I put stakes at the corners and covered the entire patch with the bird netting. The plants grew huge and went right through the netting, getting all tangled. It was a nightmare trying to get in to pick the berries. The next year I decided to not use the netting. I didn't really need it as there were so many berries that the few the birds did eat didn't really make a difference, except for the fact that I now have raspberry plants popping up all over the yard from the dropped seeds! The raspberry patch has since grown to about 40 plants!