Welcome to Bepa's Garden!
This blog is about organic gardening, healthy eating and healthy living.
Each month I will be posting Garden To-Do Lists, Tips & Techniques, Garden Project Plans, Photos from the Garden, Recipes and Book Reviews.
I hope you enjoy reading and I hope I can inspire others to start a backyard garden!
Happy Gardening!
~Rob~

Pages

Thursday, May 3, 2012

Waiting for Warmer Days


Wisteria starting to bloom.

The weather has been extremely strange this year. We've had temps in the upper 80's a few weeks ago, then it dropped down into the 30's giving us a few mornings of frost and now we are in the 60's and it has been cloudy and rainy for the past few of days. While we need the rain and all the plants and trees are blooming, there isn't much I can do in the garden until it warms up a bit more.

 The evening temperatures have finally started to stay in the 50's so I feel comfortable leaving the seedlings in the greenhouse at night until they are ready to plant. The majority of the cold crops have been planted and all that is left in the greenhouse are tomatoes, peppers, basil, eggplant more lettuce and all the "extra" seedlings that I don't have room for in the garden.


Copenhagen Market Cabbage.
Red Express Cabbage


The cabbage, broccoli, cauliflower, and kale have all been planted and are growing well under row covers. I did notice cut worm damage this morning on a couple of the cabbage plants and I am going to try the toothpick method to see if I can keep them off the plants. I started way too many seedlings as usual and still have several "extras" in the greenhouse that I can use to replace the ones that have been destroyed by pests. I would love to let the ducks roam the garden to take care of them but they would surely devour the seedlings as well! 


Overwintered leeks.


The leeks I had planted last spring were still very small by fall so last November I dug them up and transplanted them to a new bed along with some rare heirloom red onions. I covered everything with leaves and put my wire cages over them to keep the squirrels from digging them up. The leeks and onions all survived the winter and are growing strong.

Earlier in the week we harvested a couple of the larger leeks to make a delicious cream of cauliflower soup. I can't wait to make it again with fresh cauliflower from our garden!


Leeks harvest earlier this week!


Current Reading


I am currently reading All the Dirt: Reflections on Organic Farming by Rachel Fisher, Heather Stretch and Robin Tunnicliffe. It is written by three women in their 30's who have all been farming for about 10 years. They each own their own organic farm but also own Sannich Organics which sells their products along with produce from other farms. The book was written to encourage prospective farmers and provide more information about starting and running an organic farms that just isn't found in other books. So far this books does just that!

Each woman tells her story of how they got into farming and about life on each or their farms. They talk about learning through apprenticeships, taking on interns, the problems they have encountered and overcome and why they wouldn't do anything other than farming. One woman describes how she gets a feeling of rightness, and satisfaction of working her farm and how she is drawn to work that is "ecologically healthy, that involves body and mind, that harkens toward sustainability and thoughtfulness rather than blind material consumption", something that I can truly relate to. 

I am about halfway through the book and I am thoroughly enjoying it while learning alot about running an organic farm. I am passionate about organic growing and the importance of nutritious, wholesome food and this book comfirms the reasons why I want to become an organic farmer someday and makes me want to do it that much more!


Chives after an early morning rain.


Sunday, April 15, 2012

Organic Pest Control

First day outside - enjoying the sun in the mini-greenhouse.

We have a couple new additions to the garden this spring!
My wife surprised me at Easter with a pair of Pekin ducklings, something I wasn't expecting. They will be living in our garden patrolling for pests after the plants have matured and then spending the winter in the high tunnel.

I read in Eliot Coleman's books, The New Organic Grower and Four-Season Harvest that ducks make excellent pets and are better than chickens for pest control. They love potato beetles and slugs as well as other garden insects and won't destroy mature plants while feeding.


Since we got them last week they have doubled in size, it's amazing how fast they are growing. They are already starting to show their personalities, they tilt their heads when you talk to them and seem to answer back with their little chirps!

I guess my next project will be building a duck house!


The Chicken Chick


Tuesday, March 27, 2012

Seedlings in soil blocks

Butterhead lettuce in 2" soil block started 2/25.
Seeds saved from last years harvest.

Last spring I wrote about soil blocks and discussed the many benefits of using them as opposed to peat pots or plastic cell trays, but didn't have time until now to follow up and show the results.

These are pictures of plants that were started from seed between February 25th and March 7th in 3/4" soil blocks and then blocked up to 2" blocks on March 18th.

Notice the root growth in each photo. A benefit of using soil blocks is that plenty of oxygen is supplied to the roots which promotes growth. The roots will grow to the edge of the block and stop instead of getting root bound like they do in cell containers or peat pots.


Chadwick Cherry Tomato - started 3/7.

Dinosaur Kale - started 2/23.
 This year I used my own compost instead of purchasing a soil block mix as I did in the past. We had a very mild winter, but I was able to keep the compost from freezing by keeping it covered with a thick layer of leaves. The compost had hundreds of baby earth worms in it, a good sign that it was loaded with nutrients. I had very good germination rates using my own compost and the plants look very healthy.

Sweet Basil - started 2/23.

Mammouth Red Cabbage - started 3/7.


Famosa Cabbage - started 3/7.

Garlic experiment:


Last year before I harvested my garlic I let some of the scapes flower and develop bulbils which I then saved for planting. I have read that you can grow garlic from bulbils but it will take 2 to 3 seasons to form full heads of garlic. I planted some of the bulbils in 2" soil blocks to get good root systems before I plant them in the beds. As soon as it warms up a little more I will plant most of the bulbils in a bed where they will stay for the next 2 years - hopefully developing into full heads. I figure if I do this every year I will have an endless supply of garlic!


Tuesday, March 20, 2012

First Day of Spring!!


I spent this first day of spring at a greenhouse and high tunnel workshop hosted by the CTNOFA. It was held at Starlight Gardens in Durham, CT. David Zemelsky led the workshop as we toured his greenhouses and high tunnels and he shared his 13 years experience of organic growing with us.

John W. Bartlok, Jr. UConn Extension Professor Emeritus and Agricultural Engineer was also there to discuss greenhouse design and function.

What a great way to spend the first day of spring!!

Thursday, March 1, 2012

Cold Frame Plans


The plans for my mini-greenhouses (cold frames) are now available
for download on my website.

I have posted plans for both the 4' x 4' coldframe
and the 4' x 8' cold frame.

Feel free to download the plans to use to build
one for yourself.


Thursday, February 2, 2012

Spring is right around the corner!


It's almost time to start seeds for this years garden so here are some useful tools to help ease the frustration and help you become more organized.

It hasn't been much of a winter so far this year, with above normal temperatures and barely any snow, but spring is still right around the corner and it will soon be time to start those seeds for this year's garden.

 
Each year I make a vow to try and plan ahead and become more organized, but I always seem to fall behind schedule. I end up ordering seeds too late or I don't have all my supplies on hand causing the plants to not be ready on time to set out on their proper dates. I usually end up starting way too many seeds and the greenhouse becomes over-crowded and difficult to work in. The task of watering, potting up and transplanting becomes daunting and stressful and I always end up with more plants than I can fit into the beds.
 
What worked for me ...
 
Last season I took some steps to prepare myself for this years planting. When I ordered my seeds last spring I only ordered organic, non-hybrid and heirloom seed with the intention of saving seeds from the harvest for the following season. I was able to successfully save several different varieties of peppers and lettuce. I ended up with many leftover seeds that are still viable and in December I ordered some other varieties that I didn't have on hand, so this year I didn't need to order any more.

 
I have found that the best method for me to start seeds is in soil blocks. I seem to get the best germination rates using this method and it is easier for me to manage the seedlings. I normally order special soil block mix, but last year I made my own using the compost I prepared myself. With the wide spread of plant diseases like blight, I am taking steps to avoid introducing any outside elements into the garden.

 
Normally I choose what crops to grow by how appealing they look in the catalogs and without too much consideration into how much we will actually eat. One year I grew about 300 scallions that I started from seed! Although I love scallions my family can't possibly eat that many and they ended up taking up valuable space in the garden. Making a list of what vegetables we normally eat and what I have had success growing gave me a comprehensive list of what crops I should grow. Last year I started using the bio intensive planting method - double dug beds to let the plants roots grow deeper requiring less horizontal space for each plat to grow. By planting the plants closer their leaves create a canopy that block out weeds and allows the soil to retain moisture. By using this method I was able spend less time watering and weeding!

 
A useful tool I discovered is the seed starting calculator available on Johnny's Selected Seeds website. You enter the frost free date for your area, which you can find here. The form calculates the proper seed starting date for each crop and also tells you the safe time to set out plants. There are several other interactive tools available that you can download:
  • Seed Calculator
  • Target Harvest Date Calculator
  • Fall Planting Calculator
  • Caterpillar Tunnel Worksheet
  • Succession Planting Calculator
There is also a growers library where you can find growing guides for vegetables, flowers and herbs.

 
I have also created my own growing database where I can track what I grow, enter seed starting dates, crop growing information, document each crop, include pictures, keep important growing information, view and print reports and print plant labels. I have tried using written garden journals in the past, but I have found it much easier to have all the information on one place.

 
Gardening doesn't have to be overwhelming and with a little planning and the help of the useful tools available from Johnny's Seeds you can tackle the growing season head on. Print your seed starting calculator today and get start planning your garden!


Tuesday, December 6, 2011

Happy Holidays!


The summer and fall vegetables have all been harvested, the cold frames have been planted with the winter crops of kale, lettuce, carrots and transplanted leeks & onions, the garden beds have all been covered with leaves to protect them from the freezing northeast winter (if it ever gets here) so now it's time to reflect on the successes and failures of the past growing season, start planning next years crops and enjoy the holidays spent with friends and family!


Wishing everyone a safe and Happy Holiday season!!


Thursday, September 29, 2011

Seed Saving


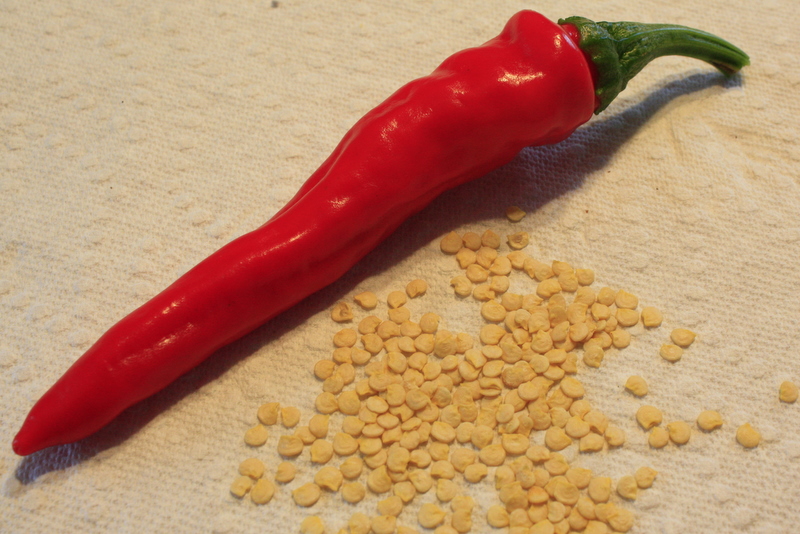
This year I planted all heirloom, organic, non-gmo, non-hybrid plants with plans on saving seeds for next year's crops. This is my first time saving seeds from the vegetables I grew, so it has been a little trial and error and a bit of a learning process. I have already saved seeds from my bell peppers, chile peppers, lettuce, and carrots. It's amazing how many seeds you can get from one bell pepper!

I have researched methods for seed storage and it all seems to come back to a dry, cool, dark place. I have also looked for seed envelopes and have found a variety at Seed Savers, and also found several sites where you can print out templates to make your own.

Making Your Own Seed Envelopes

Making your own seed envelopes is easy to do. I have tried making my own templates with seed information printed on them that I could cut out, fold and glue together. They were nice, but were very  time consuming to make and seemed to waste a lot of paper. 


Here is one of the simplest ways I have found to make a seed envelope and you can make it any size you wish. I usually make two different sizes by starting with either 3-1/2" or  5-1/4" square paper.


Start with a 5-1/4" x 5-1/4" piece of paper.
 

Fold in half from corner to corner.
Fold the center point down, about 1/8" from the bottom.
Fold one corner to the center
Fold the other corner to the center
Lift up the center points and tape the end flaps.


Now you're ready to fill!
Seeds should be stored in a cool dry location. The paper envelopes alone aren't enough to protect your seeds from humidity and temperature so the packets should be stored in an air-tight container such as a mason jar. For long term storage they can also be stored in the freezer.

One of the best resources I have come across for learning how to save seed is Seed to Seed by Suzanne Ashworth. This book goes into great detail on the process of saving and storing seeds. It also gives in depth detail on the proper technique for each plant variety. I think it s a great tool for anyone interested in learning how to save their own seeds.


Does anyone else save their own seeds?


Monday, September 19, 2011

Flood Relief & Supporting Organic Farmers


Hurricane Irene caused the worst damage in many years here in New England. Homes were washed away and destroyed along the coast in Connecticut and old covered bridges, roads and homes were washed away in Vermont. We were very fortunate and only lost a few trees, and our power & phone service was knocked out for only a few days.

Vermont was hit especially hard by this storm with some of the worst flooding some have ever seen. My wife and I got married in Vermont and we feel like it is our second home (we are actually hoping to purchase a 2nd home there soon!) We vacation there a couple of times a year and one of our favorite place to stop at is The Woodstock Farmers Market.


The Woodstock Farmers Market sells local organic produce, fresh local meats, deli foods, prepared dinners, fresh milk, eggs and all sorts of specialty food items. We always look forward to stopping buy and order holiday gifts for family, friends and business associates from their online store. They were hit especially hard by Irene, as you can see in the picture above. The store was completely destroyed and they are trying to rebuild. They are running a program called the Irene Card to help then raise cash to rebuild faster while they wait on the insurance and other disaster relief to help them. They are a wonderful market and really serve their local community!


The Vermont farmers were also hit hard. Their fields were flooded and their crops were destroyed. I am a member of the Northeast Organic Farmers Association, both Connecticut (CTNOFA) and Vermont (NOFAVT) chapters. The Vermont chapter is now accepting donations for the Farmer Emergency Fund to help Vermont farmers recover from lost crops due to the damage from Tropical Storm Irene.

If you are looking for a way to support organic farming, local food or would like to help Vermont farmers rebuild after this devastating storm click on the links above to make a donation. Help support organic farming and our healthy food supply!

Thursday, September 15, 2011

Where did the summer go?


 I had big plans at the beginning of this summer. I was going to get so much accomplished and yet here we are in the middle of September and not much has been done. Now that the kids are back in school and life is getting somewhat back to normal, it's time to regroup and get back on track.

Our new puppy Buster.
I have already ordered some seeds for next season, planted the cold frames for our winter garden and fenced in the gardens. I have been planning topics for future blog posts and hope to be more organized and do them weekly or bi-weekly from now based on the projects I am working on and the crops I have growing.

The summer gardens are almost finished. I had an excellent crop of lettuce early in the summer, with several different varieties of romaine and we enjoyed fresh salads every day for a couple months. I just planted more romaine and leaf lettuce in the cold frames for the fall and winter garden. We had a week of extremely hot and dry weather in July when we were away on vacation so my tomatoes we pretty much wiped out.The heirloom peppers are doing great. I have been harvesting the red and orange bell peppers and sweet frying peppers. They are delicious roasted! I also have some heirloom peppers called Joe's Long which are 8-10" long and are just about ready to pick. We finished harvesting the garlic, fairy tale eggplant, cucumbers, zucchini and carrots for the season.


Orange Bell Pepper waiting to ripen

Fairy Tale Eggplant

Sweet Pepper "Lipstick"


Joe's Long Pepper

This year I started saving seeds from all my organic heirloom varieties.
Would anyone be interested in a seed swap ?

Tuesday, June 21, 2011

Cold Frame (mini-greenhouse) Feedback

It's the first day of summer, all the seeds have been planted and the seedlings are all out of the greenhouse and into the garden beds, so I am now ready to start planning my winter garden.

It feels like an ongoing struggle -always trying to stay ahead of the calendar.


Did anyone download and use the cold frame (mini-greenhouse) plans I posted last year?

 If you built a cold frame and used it over the winter I would love to hear from you. You can email me and tell me how it worked (or didn't work), and be sure to include photos. I would like to do a future blog post (if I get enough responses) and include reader built cold frames with pictures, results, etc. If you have a blog include that in your email as I will include your link as well.


My cold frames ...
Mini-greenhouses - January 8th, 2011!


Using my cold frame design, I was able to grow lettuce, kale, broccoli, cauliflower, cabbage, scallions, carrots and sage throughout the (northeast) winter. Most of the plants survived but I did learn that I do need to start them earlier in late summer / early fall so the they are more established before the temperatures drop. The plants were able to survive the sub-zero weather, but grew slowly once the temperatures got cold. Having the plants almost fully grown before the winter hits would be ideal.

In the works ...

I am working on putting together full-size plans for my cold frames as well as small backyard greenhouses. They will contain a complete set of building plans, materials list, cut list and assembly instructions. I hope to have this finished by the end of summer. I am also in the process of developing a new website where the plans will be available as well as useful links, growing instruction and anything that has to do with growing organic, healthy eating and healthy living. Stay tuned ...more on this later!


Wednesday, May 25, 2011

Going Green


We try to live as green as possible. We always bring our own cloth bags when shopping, we recycle, we heat our house with a wood stove instead of using oil, we grow our own vegetables and shop from local farms for the items we don't grow ourselves, so it only made sense to get rid of the noisy, gas guzzling, air polluting lawn mower for something quieter and more economical. After a couple years of considering and reading customer reviews to compare different models I finally bought a reel mower. I ended up getting a 20" reel mower with grass catcher from Lee Valley Tools.

We have a small 1/3 acre lot with about 1,200 square feet of vegetable gardens so I figured doing the lawn with a reel mower shouldn't be that difficult. Yesterday the new mower arrived so today, instead of working,  I decided to give it a try. I have to say I am pleasantly surprised at how nice it cuts and how easy it is to push! It is such a pleasure to mow the lawn without all the noise and fumes and the lawn really looks great!  Reel mowers are said to leave a nicer lawn because they shear the grass instead of tearing it like rotary mowers do.

There are a several reasons why I went with the Lee Valley mower. I wanted a larger mower (20") with a bigger range of height adjustment. I like to leave the lawn taller and the Lee Valley reel mower is adjustable from 1-7/8" to 3". It is also made in the USA. Some other mowers also make this claim but are actually made in China. The mower only weighs 30 lbs so it is light weight and easy to store. I ended up getting the grass catcher with it, but I don't think I will use it that much because it cuts the grass small enough to just leave on the lawn.

Other than the weird looks I got from the neighbors I am very happy with this mower. I never looked at yard work as work before, it is more therapeutic and relaxing for me because I am inside in my office working most days. Using a reel mower makes it much more enjoyable to do the lawn - you get a feeling of being a little more in touch with nature, a little more Zen.